")
")
In this section, you will learn how to set up Microchip Studio to start programming the Angry Bear Board (ABB) via the USB connector. If you don't have Microchip Studio yet, you can download it here. Microchip Studio was originally called Atmel Studio and was renamed after Atmel was acquired by Microchip. Therefore, you can also use Atmel Studio 7 if you don't have Microchip Studio. Access to older versions of Atmel Studio can be found here.

This guide will further walk you through creating a simple program, uploading it to the microcontroller, and verifying the settings.
Setting up programming via USB-C
- Microchip Studio or Atmel Studio 7 and the Avrdude program (just the avrdude.exe and avrdude.conf files, which you can download here). In step 3 of this guide, we assume you will place the avrdude.exe and avrdude.conf files into C:\Avrdude\.
- Note: If you have installed the Arduino IDE, you already have Avrdude because it is part of the Arduino IDE, and you do not need to download the above files.
- Connect the ABB development board to the computer via a USB cable,
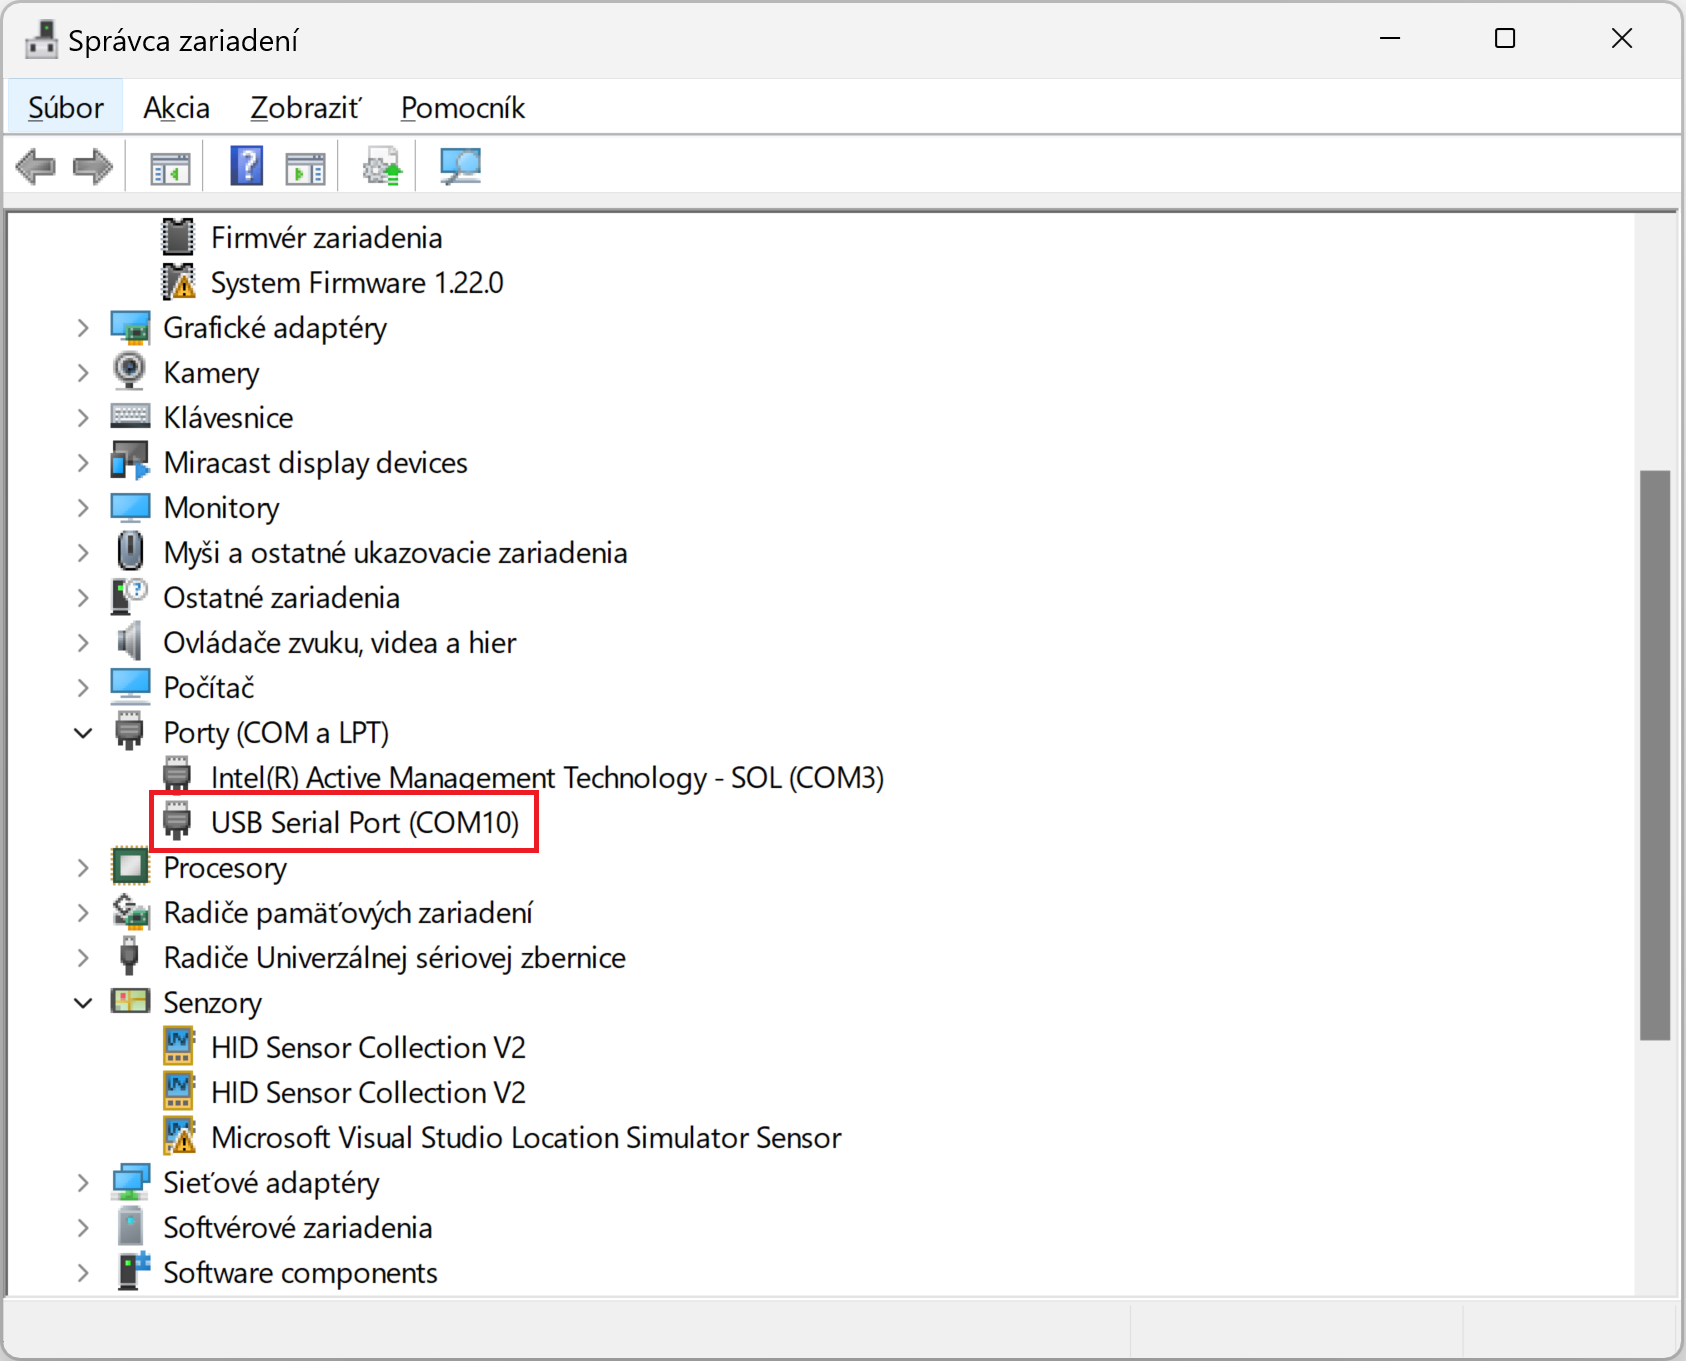
- In Windows, open Device Manager (Press the key and start typing: Device Manager),
- In Device Manager, find Ports (COM and LPT) and USB Serial Port, the port name is shown in parentheses. In the image below, the port name is COM10.
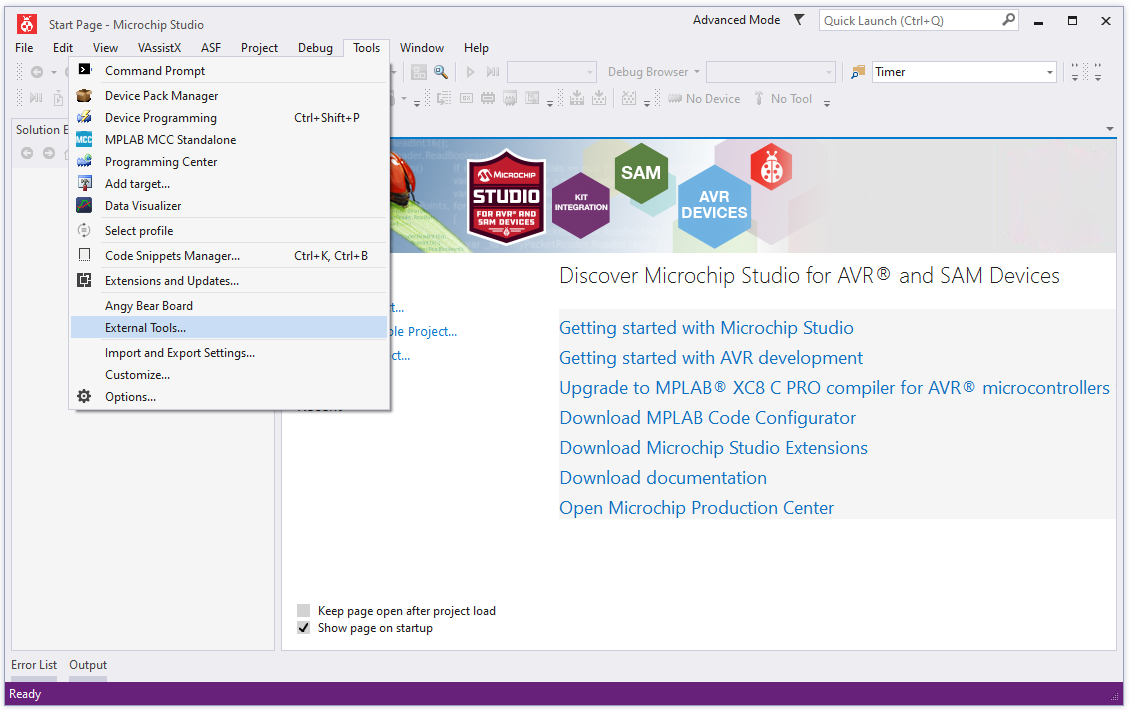
2. Open Microchip (Atmel) Studio IDE.


3. From the menu, select Tools -> External Tools…
4. In the External Tools window, enter the following:

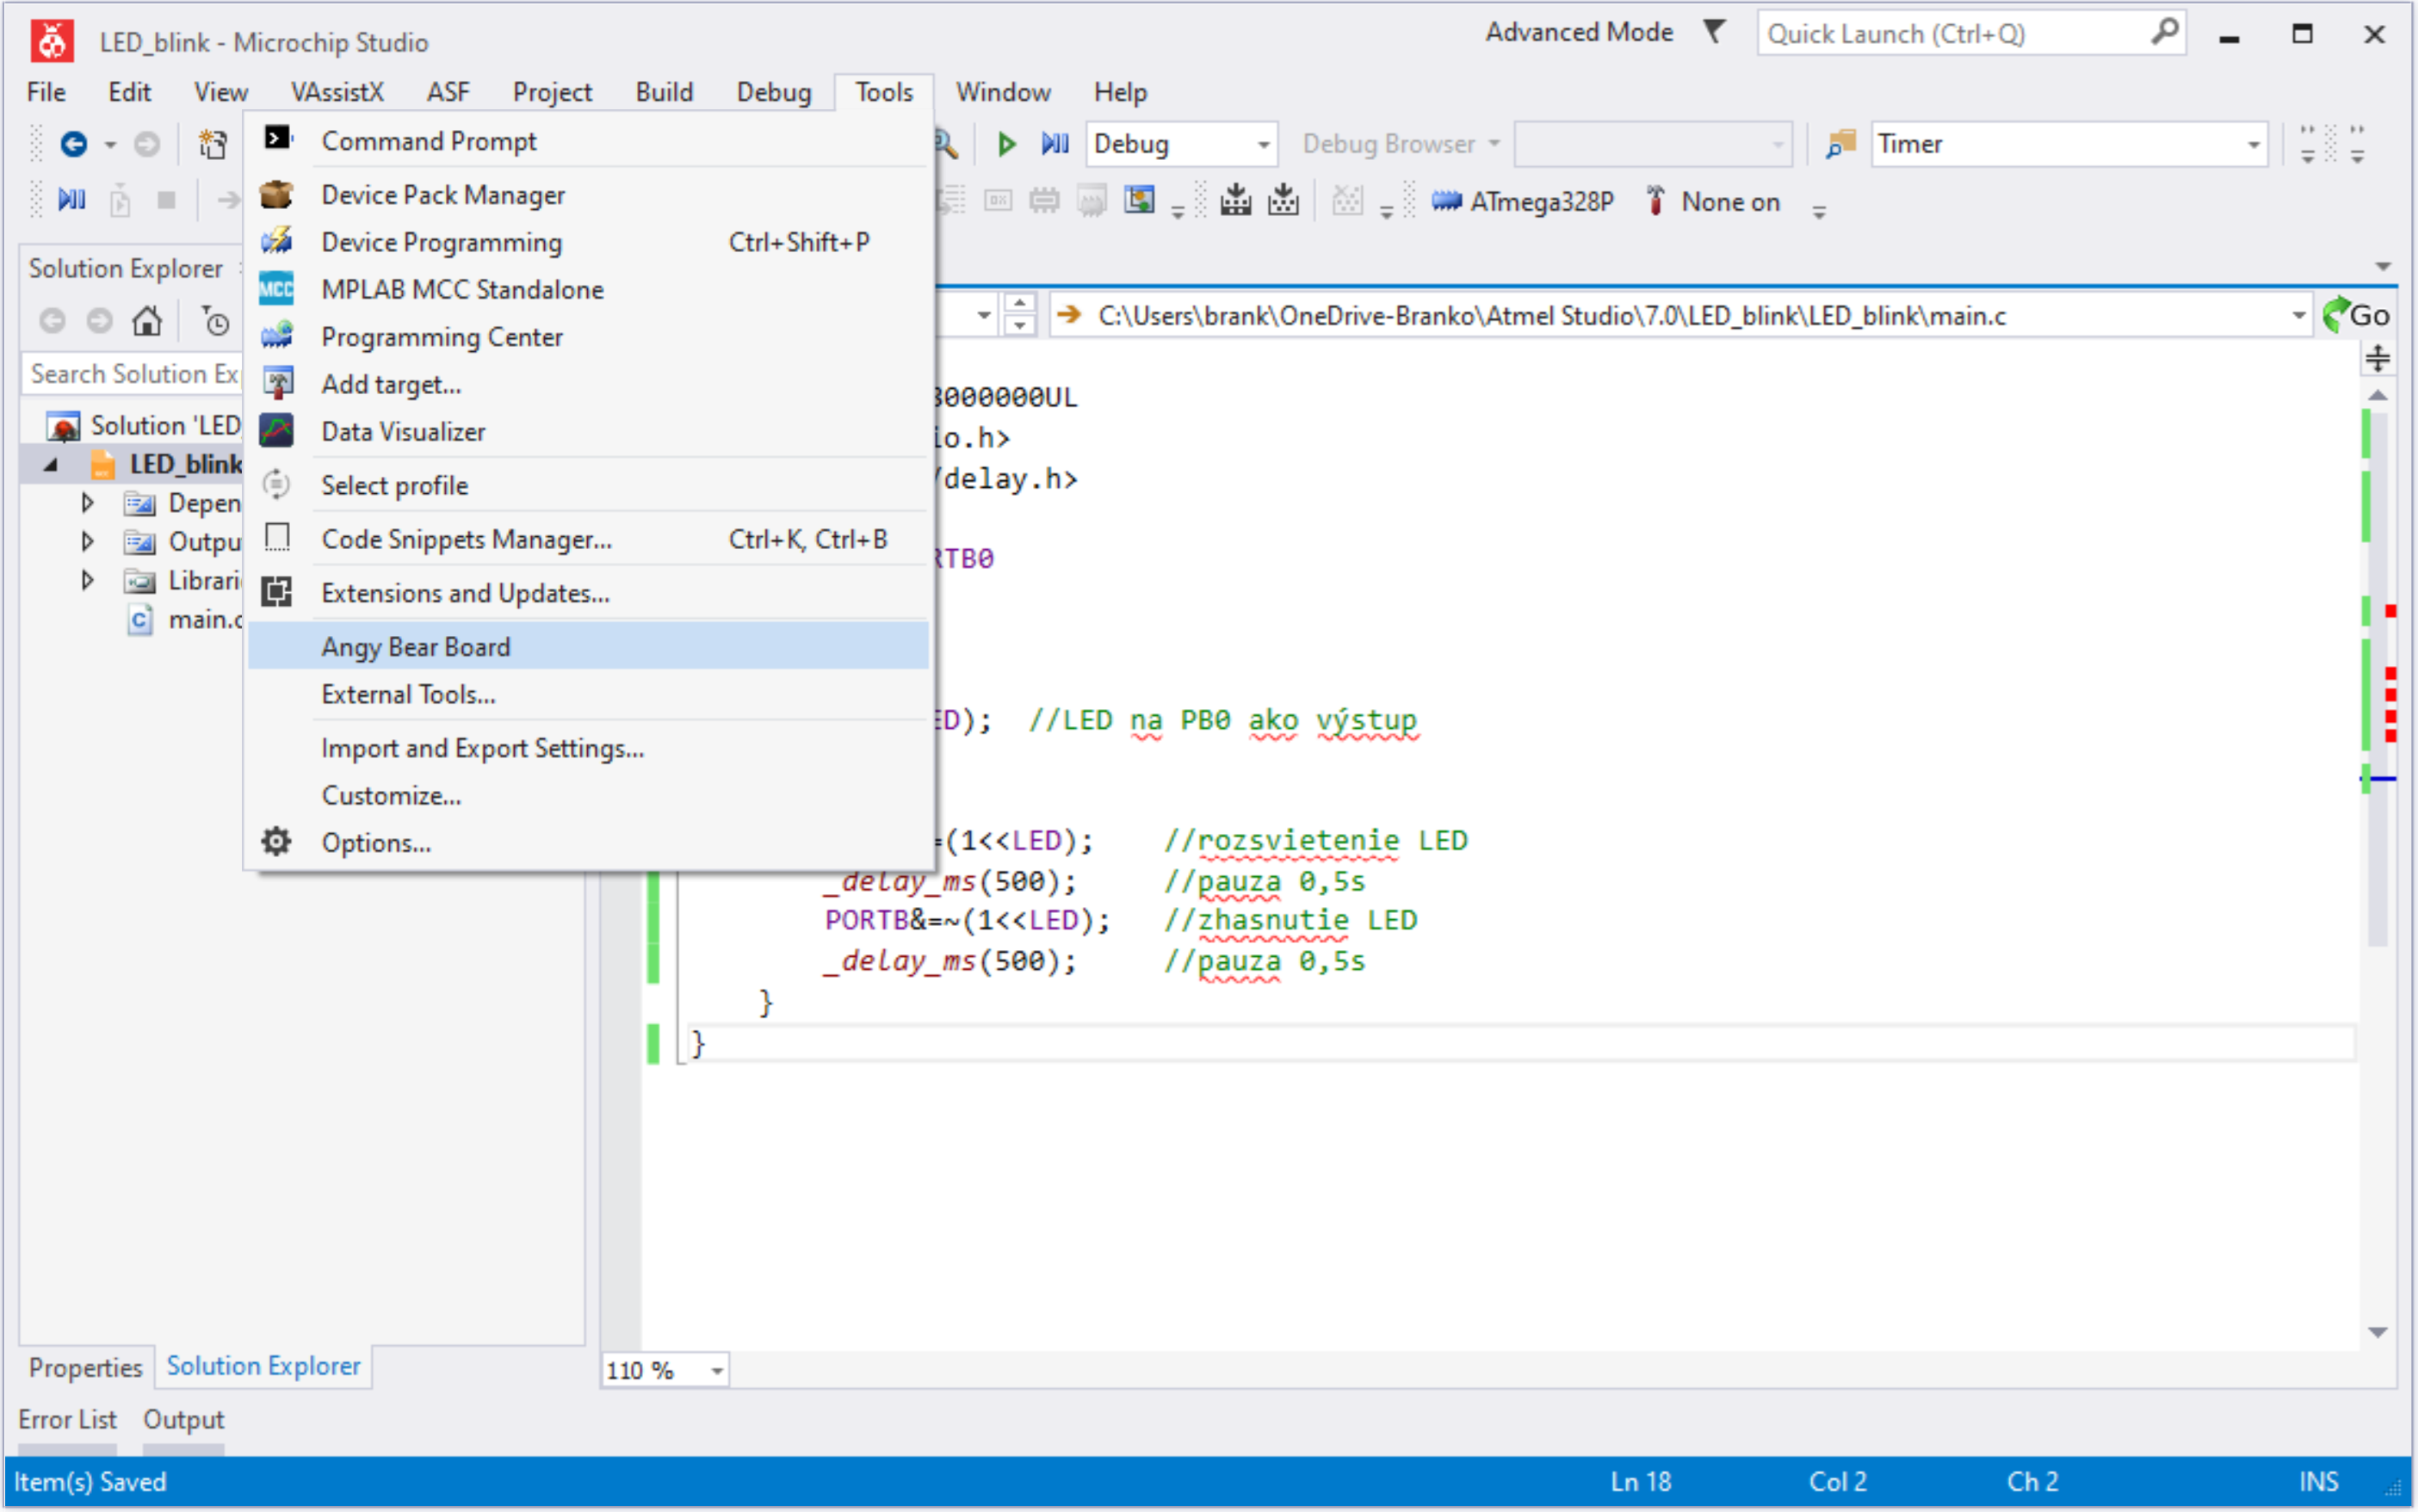
- Title:
Angry Bear Board
- Command:
Enter the path to avrdude.exe. If you saved avrdude.exe in C:\Avrdude\, use the following entry:
C:\Avrdude\avrdude.exe
If you have installed the Arduino IDE, avrdude.exe is located in the program files:C:\Program Files (x86)\Arduino\hardware\tools\avr\bin\avrdude.exe
This is the standard path to avrdude.exe. Check the path and location of the avrdude.exe file.
- Arguments:
If you saved avrdude.conf in C:\Avrdude\, use the following entry:-C"c:\Avrdude\avrdude.conf" -v -patmega328p -carduino -PCOM10 -b250000 -D -Uflash:w:"$(ProjectDir)Debug\$(TargetName).hex":i
If you have installed the Arduino IDE, use the following entry and ensure the path to avrdude.conf exists:-C"c:\Program Files (x86)\Arduino\hardware\tools\avr\etc\avrdude.conf" -v -patmega328p -carduino -PCOM10 -b250000 -D -Uflash:w:"$(ProjectDir)Debug\$(TargetName).hex":i
Warning: Only change the parts of the text marked in blue, i.e., the path to avrdude.conf and the COM port to which the ABB board is connected (see step 1).
Explanation of the arguments (in English):
-C<Path_to_avrdude.conf> – a path to avrdude.conf, you can find this file in Arduino IDE’s installation directory. Ensure you enter the path in quotes in case there are any spaces in your path.
-p<part number> – AVR processor model
-c<programmer type> – programmer type being used to program the board
-P<port> – COM port you should have noted in stage 2
-b<baud rate> – baud rate for the programmer.
-D – disables auto erase for flash memory (required for wiring programmer used with Arduino Mega 2560)
-U<memorytype>:<operation>:<path to HEX file>:<format> – this is where you should leverage Atmel Studio’s variables to always point to freshly compiled and generated HEX file. List of variables and their descriptions can be found at Atmel’s help page.
- Check the Use Output Window checkbox and click OK.
First program
We will create a simple program to verify the settings mentioned above. The program will blink the LED0 LED at a frequency of 1 Hz, i.e., the LED will be on for 0.5s and off for the same time.
#define F_CPU 8000000UL
#include <avr/io.h>
#include <util/delay.h>
#define LED PORTB0
int main(void)
{
DDRB=(1<<LED);//LED on PB0 as output
while (1)
{
PORTB|=(1<<LED);//turn on LED
_delay_ms(500);//pause 0.5s
PORTB&=~(1<<LED);//turn off LED
_delay_ms(500);//pause 0.5s
}
}
Uploading the program
Before uploading the program, it needs to be compiled first. Compile the program by selecting from the menu: Build -> Build Solution or press the F7 button. Check the output:
Build succeeded.
========== Build: 1 succeeded or up-to-date, 0 failed, 0 skipped ==========
Upload the program by selecting from the menu: Tools -> Angry Bear Board
Check the output:
avrdude.exe: AVR device initialized and ready to accept instructions
Reading | ################################################## | 100% 0.01s
avrdude.exe: Device signature = 0x1e950f (probably m328p)
avrdude.exe: safemode: lfuse reads as 0
avrdude.exe: safemode: hfuse reads as 0
avrdude.exe: safemode: efuse reads as 0
avrdude.exe: reading input file "C:\Users\...\LED_blink.hex"
avrdude.exe: writing flash (186 bytes):
Writing | ################################################## | 100% 0.06s
avrdude.exe: 186 bytes of flash written
avrdude.exe: verifying flash memory against C:\Users\...\LED_blink.hex:
avrdude.exe: load data flash data from input file C:\Users\...\LED_blink.hex:
avrdude.exe: input file C:\Users\...\LED_blink.hex contains 186 bytes
avrdude.exe: reading on-chip flash data:
Reading | ################################################## | 100% 0.07s
avrdude.exe: verifying ...
avrdude.exe: 186 bytes of flash verified
avrdude.exe: safemode: lfuse reads as 0
avrdude.exe: safemode: hfuse reads as 0
avrdude.exe: safemode: efuse reads as 0
avrdude.exe: safemode: Fuses OK (E:00, H:00, L:00)
avrdude.exe done. Thank you.