")
")
To program microcontrollers (MCUs), a programmer specifically designed for the type of MCU is usually required. For programming Atmel AVR MCUs, this includes the AVR Dragon (no longer produced) or Atmel ICE. The advantage of programmers, besides the ability to upload programs to the MCU, is the debugging capability, i.e., debugging the program directly on the chip while it is running. The disadvantage is the relatively high cost of professional programmers.
If the MCU has a bootloader installed, it can be programmed via serial link (UART). Such a bootloader is included in development boards of the Arduino platform. With a bootloader, code can be uploaded to the MCU via the UART interface without needing a programmer. If the MCU does not have such a bootloader, it can only be uploaded using the aforementioned programmer. Arduino boards are programmed using the simple Arduino IDE (Integrated Development Environment). Arduino is natively programmed in Wiring, a meta-language with an enhanced set of macros over C++. More about programming Arduino can be found here. Importantly, the code can also be written in C. When programming AVR family MCUs (Arduino UNO, Arduino Mega, etc.), Arduino IDE recognizes the macros of the given MCU. This means that the MCU can be programmed in Arduino IDE just like in Microchip Studio (formerly Atmel Studio), which is a professional IDE for programming MCUs from Microchip (formerly Atmel). The advantage of Microchip Studio is, for example, clearer color-coded syntax highlighting, syntax checking, variable, function, and register existence and referencing definitions of functions.
Steps to set up Microchip Studio for uploading code to an Arduino board:
Before applying the following steps, ensure you have installed:
- Microchip Studio or Atmel Studio 7 and Arduino IDE, or
- Microchip Studio or Atmel Studio 7 and the necessary avrdude.conf and avrdude.exe files, which you can download here.
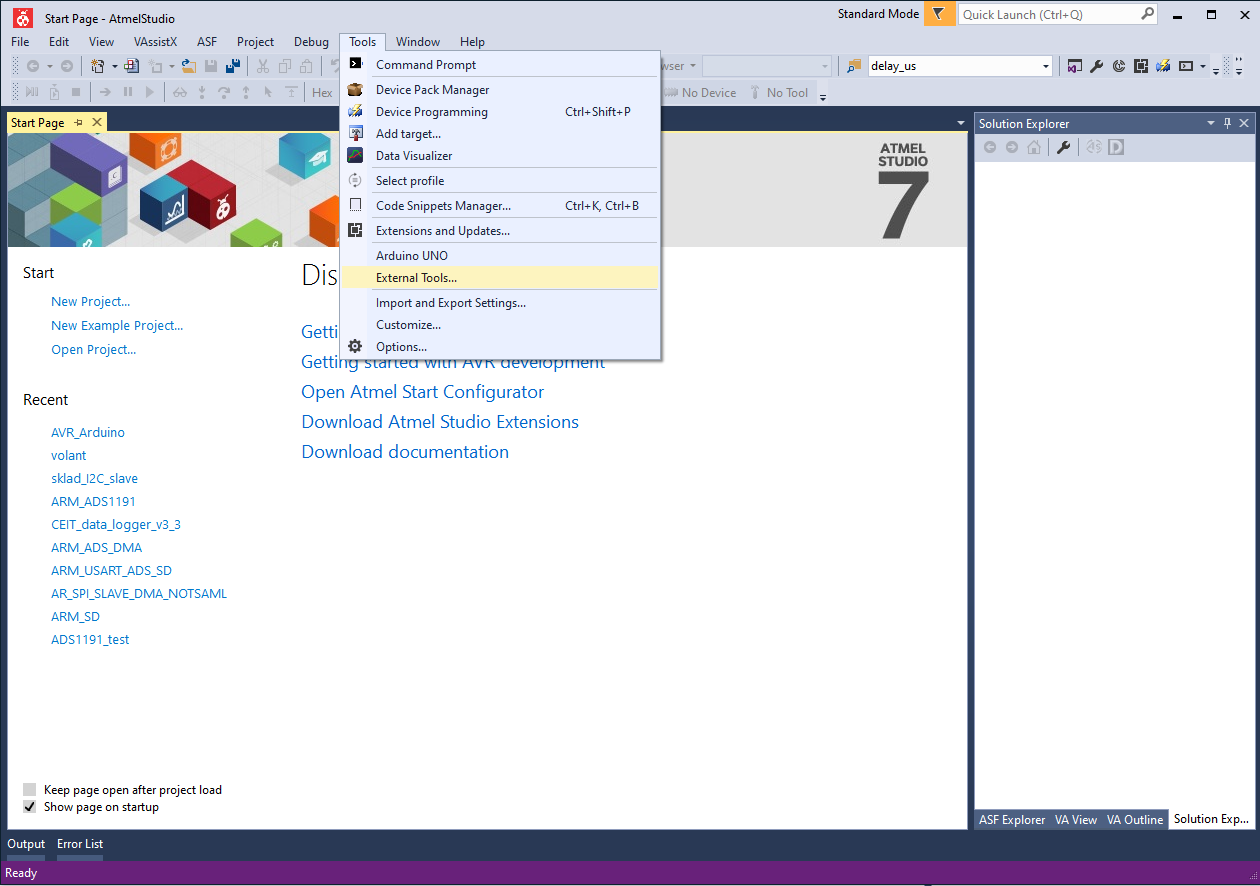
1. Launch Microchip (Atmel) Studio IDE.


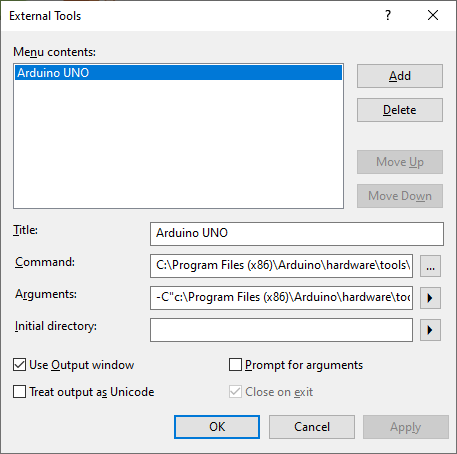
- Title:
Arduino UNO
- Command:
C:\Program Files (x86)\Arduino\hardware\tools\avr\bin\avrdude.exe
The standard path to avrdude.exe is listed. Check the path and location of the avrdude.exe file.
- Arguments:
-C"c:\Program Files (x86)\Arduino\hardware\tools\avr\etc\avrdude.conf" -v -patmega328p -carduino -PCOM6 -b115200 -D -Uflash:w:"$(ProjectDir)Debug\$(TargetName).hex":i
NOTE: If setting up the program upload for MDB2 or Angry Bear Board, it is necessary to change the upload speed to 250,000 Baud (-b250000)!!!
Meaning of arguments:
-C<Path_to_avrdude.conf> – a path to avrdude.conf, you can find this file in Arduino IDE’s installation directory. Ensure you enter the path in quotes in case there are any spaces in your path.
-p<part number> – AVR processor model
-c<programmer type> – programmer type being used to program the board
-P<port> – COM port you should have noted in stage 2
-b<baud rate> – baud rate for the programmer.
-D – disables auto erase for flash memory (required for wiring programmer used with Arduino Mega 2560)
-U<memorytype>:<operation>:<path to HEX file>:<format> – this is where you should leverage Atmel Studio’s variables to always point to freshly compiled and generated HEX file. List of variables and their descriptions can be found at Atmel’s help page. - Check the box Use Output Window and click OK.
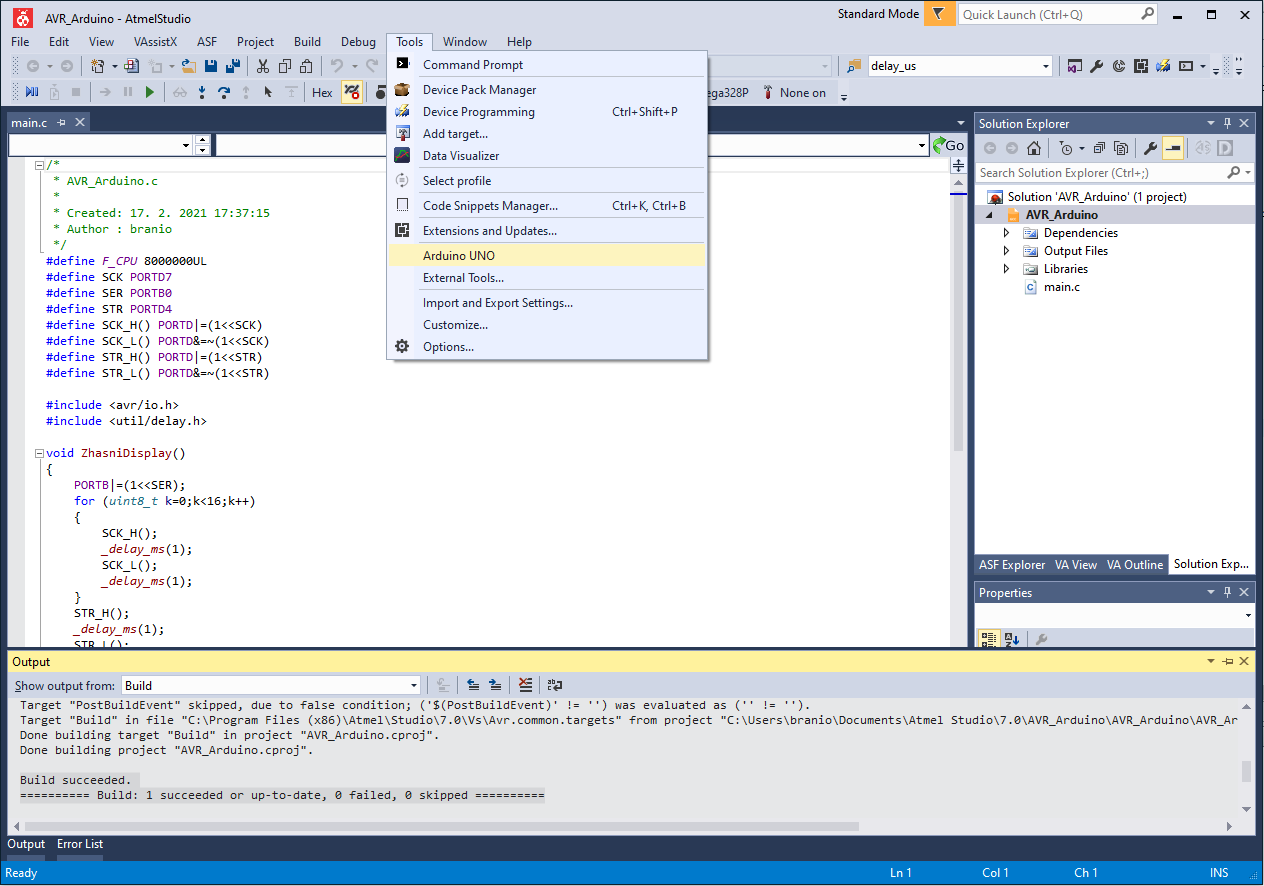
Build succeeded.
========== Build: 1 succeeded or up-to-date, 0 failed, 0 skipped ==========
5. Upload the program by selecting from the menu: Tools -> Arduino UNO
avrdude.exe: AVR device initialized and ready to accept instructions
Reading | ################################################## | 100% 0.01s
avrdude.exe: Device signature = 0x1e950f (probably m328p)
avrdude.exe: safemode: lfuse reads as 0
avrdude.exe: safemode: hfuse reads as 0
avrdude.exe: safemode: efuse reads as 0
avrdude.exe: reading input file "C:\Users\...\AVR_Arduino.hex"
avrdude.exe: writing flash (276 bytes):
Writing | ################################################## | 100% 0.06s
avrdude.exe: 276 bytes of flash written
avrdude.exe: verifying flash memory against C:\Users\...\AVR_Arduino.hex:
avrdude.exe: load data flash data from input file C:\Users\...\AVR_Arduino.hex:
avrdude.exe: input file C:\Users\...\AVR_Arduino.hex contains 276 bytes
avrdude.exe: reading on-chip flash data:
Reading | ################################################## | 100% 0.05s
avrdude.exe: verifying ...
avrdude.exe: 276 bytes of flash verified
avrdude.exe: safemode: lfuse reads as 0
avrdude.exe: safemode: hfuse reads as 0
avrdude.exe: safemode: efuse reads as 0
avrdude.exe: safemode: Fuses OK (E:00, H:00, L:00)
avrdude.exe done. Thank you.
Used resources and interesting links
Arduino in Slovak: Arduino ProgrammingProgramming Arduino with Atmel Studio 7
Arduino / ATmega328p Embedded C Firmware Programming Tutorial